Showing posts with label ubuntu 14.04. Show all posts
Showing posts with label ubuntu 14.04. Show all posts
April 09, 2015
Installing a storage area network (SAN) on Ubuntu 14.04 LTS
System info: `uname -a` returns: Linux tech 3.13.0-24-generic #46-Ubuntu SMP Thu Apr 10 19:11:08 UTC 2014 x86_64 x86_64 x86_64 GNU/Linux
A storage area network is implemented to access storage device from a remote machine in a way that it appears to be locally attached. This is implemented using Small Computer System Interface (SCSI).
A storage area network consists of:
1. Initiator (client)
2. Target (server)
Installation instructions:
Switch to super user. Use command: sudo -i or else use su root
1. Install iscsitarget (iSCSI: Internet Small Computer System Interface)
Checkout: http://iscsitarget.sourceforge.net/
2. Create a logical unit for storing data
(lun: logical unit number)
We are creating a 1GB file (/root/lun0) for storing data on SAN.
Run "man dd" for more information on dd command.
3. Enable iscsitarget by editing /etc/default/iscsitarget and setting ISCSITARGET_ENABLE to 'true'.
4. Configure ISCSI by editing file: /etc/iet/ietd.conf
Check screenshot for reference.
5. Restart iscsitarget /etc/init.d/iscsitarget (start|stop|restart|...)
sudo fdisk /dev/sdX <---- In our case /dev/sdb is the virtual disk
n (add new partition table)
p (primary partition)
<enter> (enter, enter, enter for default values)
w (write table and exit)
Check screenshot for reference.
6. Format and make a new file system using mkfs on first partition of the virtual disk (/dev/sdX1)
7. Mount the new partition for use:
Check back on "Disks" utility. Your storage area network drive should be ready for use.
Read More
A storage area network is implemented to access storage device from a remote machine in a way that it appears to be locally attached. This is implemented using Small Computer System Interface (SCSI).
A storage area network consists of:
1. Initiator (client)
2. Target (server)
Installation instructions:
Switch to super user. Use command: sudo -i or else use su root
sudo -i
A. Target installation on Ubuntu:
1. Install iscsitarget (iSCSI: Internet Small Computer System Interface)
apt-get install iscsitarget
Checkout: http://iscsitarget.sourceforge.net/
2. Create a logical unit for storing data
dd if=/dev/zero of=/root/lun0 bs=1M count=1024
(lun: logical unit number)
We are creating a 1GB file (/root/lun0) for storing data on SAN.
Run "man dd" for more information on dd command.
3. Enable iscsitarget by editing /etc/default/iscsitarget and setting ISCSITARGET_ENABLE to 'true'.
ISCSITARGET_ENABLE=true
4. Configure ISCSI by editing file: /etc/iet/ietd.conf
Target iqn.2014-04.localhost:target0
    Lun 0 Path=/root/lun0,Type=fileio
    initiator-address 127.0.0.1
(iet: iscsi enterprise target)
Add a new target that points to created lun0 file (/root/lun0)Check screenshot for reference.
5. Restart iscsitarget /etc/init.d/iscsitarget (start|stop|restart|...)
/etc/init.d/iscsitarget restart
B. Initiator configuration on Ubuntu:
2. Discover running instances of SAN target on a remote machine
Use target IP
Run 'man iscsiadmn' for more information on arguments.
iscsiadmn -m discovery -p 127.0.0.1 -t st
Run 'man iscsiadmn' for more information on arguments.
3. Login in to SAN target
iscsiadm --mode node --login --portal 127.0.0.1:3260 --target="iqn.2014-04.localhost:target0"
4. A new storage drive (SAN disk) shows up under /dev. You can view and format this virtual disk using GUI utility called "Disks"
5. Make a new partition table for our virtual disk
Replace /dev/sdX with your virtual disk which is like /dev/sdb in our case.
Replace /dev/sdX with your virtual disk which is like /dev/sdb in our case.
sudo fdisk /dev/sdx
n
p
<enter>
w
n (add new partition table)
p (primary partition)
<enter> (enter, enter, enter for default values)
w (write table and exit)
Check screenshot for reference.
6. Format and make a new file system using mkfs on first partition of the virtual disk (/dev/sdX1)
mkfs.ext4 /dev/sdX1
7. Mount the new partition for use:
mkdir /root/san
mount /dev/sdX1 /root/san
Check back on "Disks" utility. Your storage area network drive should be ready for use.
August 07, 2014
Capture/Record webcam, desktop and audio under Ubuntu 14.04
1 comment:
Author:
tec
at
8/07/2014 06:23:00 pm
Labels:
linux webcam screencasting,
screen recording,
screencast,
ubuntu,
ubuntu 14.04,
vlc

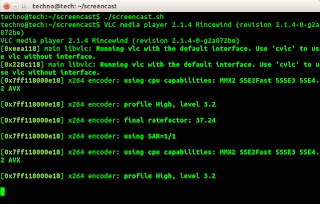
Bash script:
fname=`date +"%d.%m.%Y_%H:%M:%S_%P"`.'_screencast.mp4'
vlc --qt-minimal-view v4l2:///dev/video0 &
vlc --qt-minimal-view screen:// :screen-fps=20 :screen-follow-mouse :live-caching=300 :input-slave=alsa://hw:0,0 :sout="#transcode{vcodec=h264,vb=384,fps=5,acodec=mpga}:duplicate{dst=std{mux=mp4,access=file,dst='$fname'}}" &
These set of commands start two instances of VLC.
The first command fires up a minimal view of VLC with video source "/dev/video0" (the default location of webcamera in most general cases).
The second command starts another minimal VLC instance with video from screen:// (desktop) and audio from default built-in microphone "hw:0,0". Output is encoded and saved in current directory as an mp4 file.
Recording stops when you close VLC instances.
Subscribe to:
Posts (Atom)


